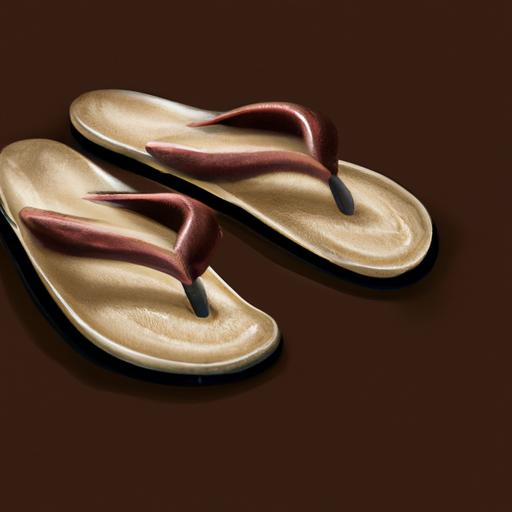
Are you looking for a fun and creative way to update your favorite pair of slippers? If so, you’re in luck! In this article, we’ll walk you through the process of making your own custom slipper soles.
From gathering the necessary materials to decorating the finished product, you’ll learn how to create your own unique slipper soles.
So, grab your supplies and let’s get started!
Table of Contents
Short Answer
Making slipper soles requires a few simple steps.
First, trace the outline of your foot onto a piece of paper and cut it out.
Then, transfer this outline onto a piece of craft foam, and cut out the shape.
To make the sole more durable, glue a piece of thin plastic onto the bottom of the foam with a hot glue gun.
Finally, glue the foam sole to the upper part of the slipper, and the slipper is ready to wear.
What You’ll Need to Make Slipper Soles
When it comes to making slipper soles, youll need a few basic items.
First, youll need a pair of old slippers.
The size and shape of the slippers will determine the size and shape of the soles youll need to make.
Second, youll need some fabric.
Youll want to choose a fabric that is sturdy and durable enough to withstand constant wear and tear.
Finally, youll need an adhesive.
Make sure to choose an adhesive that is specifically designed for fabric and will remain durable over time.
Once you have these items, youre ready to make slipper soles.
Preparing the Fabric

When it comes to making slipper soles, the first step is to prepare the fabric.
This will be the material that will make up the new sole of the slipper, so it’s important to choose the right fabric.
Depending on the look you’re going for, you may want to opt for a thicker fabric such as a canvas or felt material, or a lighter fabric like cotton or linen.
You’ll also need to determine the size and shape of the fabric, as this will determine the size of the sole.
To get the most accurate measurements, it’s best to measure the existing sole of the slipper and use that as a guide.
Once you have your fabric chosen and cut, you’re ready to move on to the next step.
Applying the Adhesive
Applying adhesive to the back of fabric is an important step in creating slipper soles.
This will ensure that the fabric stays in place and wont move around while the adhesive is drying.
For best results, use an adhesive specifically formulated for fabric, such as a hot glue gun, fabric glue, or contact cement.
When using a hot glue gun, make sure to apply small dots of glue to the back of the fabric and spread them out evenly.
If using fabric glue or contact cement, follow the directions on the label for best results.
Then, carefully press the fabric onto the slipper, making sure to get a good seal between the two.
Finally, press firmly and wait for the adhesive to dry completely before wearing your newly-created slipper soles.
Attaching the Fabric to the Slipper

When it comes to making slipper soles, attaching the fabric to the slipper is the most important step.
To ensure a successful project, its important to use the right adhesive and to press firmly when attaching the fabric.
First, decide on the size and shape of the sole.
Cut the fabric to the desired size, adding a few extra centimeters to all sides.
This will ensure that the fabric fits properly when it is attached to the slipper.
Once the fabric is cut, it is time to apply the adhesive.
For best results, use a quality fabric adhesive that is designed for this type of project.
Follow the instructions on the packaging and apply the adhesive to the back of the fabric.
Next, attach the fabric to the slipper.
Start by lining up the edges of the fabric with the edges of the slipper.
Once the fabric is in place, press firmly to ensure that it is properly attached.
Some adhesives require a few minutes of pressing, so be sure to follow the instructions on the product packaging.
Finally, check to make sure that the fabric is properly attached.
If there are any gaps or loose edges, press them firmly to make sure that they are secured.
Once the adhesive is dry, your slipper soles are complete.
With a few simple steps, you can create a unique and stylish pair of slipper soles.
Tips for a Successful Slipper Sole Creation
Having the right materials is key to creating the perfect slipper sole.
Start by gathering a pair of old slippers, fabric, and an adhesive of your choice.
Make sure the fabric you choose is thick enough to provide cushion and hold up to wear and tear.
Additionally, choose an adhesive that is strong enough to last, yet not too strong that it damages the fabric or slipper.
Next, its time to cut the fabric.
Measure and mark the fabric according to the desired size and shape of the sole.
Cut the fabric with sharp scissors, then set aside.
Once the fabric is cut, its time to apply the adhesive.
Read the instructions on the adhesive package and make sure to follow them carefully.
Apply the adhesive to the back of the fabric and stick it onto the slipper.
Press firmly and wait for it to dry.
Repeat for the other slipper.
Now, its time to check your work.
Make sure the fabric is securely attached and that there are no gaps or bubbles between the fabric and the slipper.
If everything looks good, then youre all set!
Creating the perfect slipper sole doesnt have to be difficult.
With a few simple steps and the right materials, you can easily and affordably give your slippers a new look.
Have fun experimenting with different fabric and adhesive combinations to create a unique and stylish pair of slipper soles.
Decorating Your Slipper Soles

When it comes to decorating your slipper soles, the possibilities are endless.
With the right materials and a little creativity, you can create a unique pair of slippers that reflect your own style and personality.
There are a few key steps to making sure your slipper soles turn out perfect.
First, its important to choose the right material for your slipper soles.
Consider the type of fabric youll be using and how it will look when its finished.
If youre planning to use a patterned fabric, make sure its a color and pattern that will match the rest of your slippers.
Also, take into account the thickness of the fabric; if its too thin, it wont be able to provide enough cushioning for your feet.
Next, youll need to cut the fabric to the desired size and shape of the sole.
Be sure to leave enough extra fabric around the edges to allow for any trimming that might be needed.
If youre not comfortable with cutting the fabric yourself, some fabric stores offer services that will do it for you.
Once the fabric is cut, its time to attach it to the slipper.
Use an adhesive designed for fabric to ensure your slipper soles stay in place.
Apply the adhesive to the back of the fabric and carefully press it onto the slipper.
Once its firmly in place, wait for the adhesive to dry before wearing the slippers.
Finally, if youd like to add some extra flair to your slipper soles, consider using trims, appliques, or other decorative elements to give them a unique look.
You can find a wide variety of trims and appliques at your local craft store, and you can get creative with how you use them.
By following these simple steps, youll be able to create a unique and stylish pair of slipper soles that reflect your own personal style.
With a little bit of creativity and some basic supplies, you can make slipper soles that are perfect for any occasion.
Finishing Up
Once the fabric is attached and the adhesive is dry, you can finish up your slipper soles.
If you want to make sure that the fabric is secure, you can use a sewing machine or hand-sew the edges of the fabric to the slipper.
This will help to create a durable and long-lasting product.
You can also use a hot glue gun to further secure the fabric to the slipper.
After the fabric is securely attached, you can decorate the slippers with embroidery, sequins, beads, or other decorative elements.
This is a great way to make your slippers unique and give them a special, personalized touch.
You can also use paint to create a unique design or pattern on the slipper soles.
If you want to further protect your slipper soles, you can use a waterproofing spray or sealant.
This will help to ensure that the fabric and the adhesive will not be damaged by moisture.
Once your slipper soles are complete, you can enjoy wearing them around the house or out and about.
With a few simple steps, you can create a unique and stylish pair of slipper soles that will make you look and feel great.
Final Thoughts
Making slipper soles is a great way to give your slippers a unique and stylish look.
With just a few simple steps, you can create a perfect pair of slipper soles, whether you want to keep it minimal or decorate them with some of your favorite colors and patterns.
Get creative and have fun with it – you’ll be amazed at what you can create!