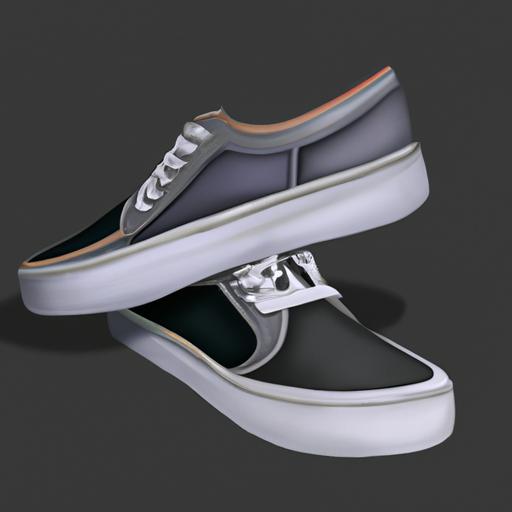
Vans shoes are a classic style with a timeless look.
They’re fashionable, they’re affordable, and they’re incredibly durable.
But, like any shoe, they can become worn over time, and sometimes need repair.
If you’re looking to repair your Vans shoes, you’ve come to the right place.
In this guide, we’ll provide step-by-step instructions for how to repair Vans shoes, along with some tips and tricks to keep your shoes looking good as new.
We’ll also discuss the benefits of repairing your Vans shoes, so you can get the most out of them.
So, let’s get started!
Table of Contents
Short Answer
Vans shoes are made of durable material, but they may still need repairs from time to time.
To repair a pair of Vans shoes, you will need some basic supplies, such as needle and thread, leather glue, and a shoe brush.
You can then use the supplies to patch up any holes or tears in the material, and glue down any loose parts.
If the shoes are still looking a bit worn, you can use a shoe brush to buff up the material to give them a fresh, new look.
Why Vans Shoes Are Popular
Vans shoes are a classic and beloved style of footwear, and its easy to see why theyre so popular.
Their signature checkerboard pattern and canvas material make them a great choice for both everyday wear and for more formal occasions.
Theyre also known for their durability, so even if you wear them every day, they can easily last you years.
Vans shoes also come in a variety of styles, from slip-ons to lace-ups, so you can find the perfect pair for any occasion.
Plus, the variety of colors and patterns mean that you can find a look thats unique to you and suits your style.
With all these qualities, its no wonder why Vans shoes have become such a popular choice for so many people.
Prepping the Shoes for Repair

Before you can repair your Vans shoes, you’ll need to properly prep them for the job.
This includes cleaning off any dirt, grime, and debris from the exterior of the shoes.
To do this, take a damp cloth and wipe down the shoes, paying special attention to any areas that are damaged or worn.
This will help remove any dirt or debris that could interfere with the repair process.
After wiping down the shoes, use a soft-bristle brush to brush away any excess dirt or debris.
This will help ensure that the repair process goes smoothly and that your shoes look as good as new once theyre done.
Once youve prepped the shoes, youre ready to begin the repair process.
Removing Excess Dirt and Debris
When it comes to repairing Vans shoes, the first step is to remove any dirt or grime from the shoes exterior.
This is best done with a damp cloth, which should be used to wipe away any obvious dirt or grime.
Additionally, a soft-bristle brush can be used to remove any remaining dirt or debris.
This is important to do as the dirt and debris can cause further damage to the shoe if it is left behind.
Additionally, it is important to remove any dust or dirt from the interior of the shoe as well.
This can be done using a vacuum or compressed air to get into all the nooks and crannies.
Once the dirt and debris have been removed, it is time to move on to the next step.
Applying Shoe Glue or Adhesive

Repairing Vans shoes is a simple and effective way to get them looking like new again, and the final step in the process involves applying a small amount of shoe glue or adhesive to the affected area.
When selecting a glue or adhesive, it’s important to choose one that is specifically designed for shoes, as regular craft glues may not be strong enough to hold the repair.
It’s also important to make sure the glue is waterproof, as this will help ensure the repair lasts for longer.
When applying the glue or adhesive, it can be helpful to use a small paintbrush to spread the material evenly over the surface.
For best results, be sure to cover the entire area that needs to be repaired, and use a thin layer of glue or adhesive.
Allow the material to dry completely before wearing the shoes again.
Once the glue or adhesive has dried completely, it’s a good idea to test the repair by lightly pressing the area with your finger.
If the area is still weak or does not hold up to pressure, you may need to apply a second layer of adhesive or glue.
Once the repair is complete, you can enjoy your Vans shoes looking like new again!
Letting the Glue Dry
Once you have applied the glue or adhesive to the affected area, you need to let it dry.
This is an important step in the repair process as it will ensure that the adhesive sticks properly and that your Vans shoes will be as good as new.
You should allow the glue to dry completely before wearing the shoes or putting them away.
Depending on the type of glue or adhesive used, the drying time can vary.
The directions on the packaging should provide an estimate for how long it will take the glue to dry.
For most adhesives, it should take around 30 minutes for the glue to be completely dry and ready for use.
In order to make sure the glue dries properly, you should keep the shoes in a well-ventilated area.
This will help the air circulate and help the adhesive dry faster.
You should also avoid using a hairdryer or other heat source to speed up the drying process, as this can damage the shoes.
Once the glue has dried completely, you can put your Vans shoes back on and enjoy them looking as good as new.
Repairing your Vans shoes is a great way to save money and extend the life of your shoes.
Tips for Repairing Vans Shoes

When it comes to repairing Vans shoes, there are a few tips and tricks you should keep in mind.
First, make sure to use a damp cloth to wipe away any dirt or grime from the shoes exterior.
This will help ensure that the glue or adhesive you use to repair the shoes will stick properly.
Its also important to use a soft-bristle brush to remove any excess dirt or debris.
This will help ensure that the repairs look as clean and professional as possible.
When applying the glue or adhesive, its best to use a small amount and to make sure that you cover the affected area completely.
Its also important to let the glue dry before wearing the shoes, as the adhesive will need time to set properly.
Finally, if you can, its best to use a shoe repair kit with all the necessary materials, as this will make the process easier and ensure that you have everything you need.
By following these tips, you can easily repair your Vans shoes and make them look like new again.
With a few simple steps, you can save yourself a lot of money by repairing your shoes instead of having to buy a new pair.
Benefits of Repairing Vans Shoes
When it comes to shoes, it is often better to repair them than to replace them.
This not only saves money, but it also helps reduce waste and is much better for the environment.
Repairing Vans shoes is a great way to extend the life of your favorite shoes and keep them looking their best.
It is a simple and cost-effective way to keep your shoes in top condition.
When you repair your Vans shoes, you can make sure they look like new again.
This can help to prevent any further damage and keep them from looking worn and scuffed.
By taking the time to repair them, you can get a few more years out of your favorite pairs of shoes and make sure they look good for longer.
Repairing your Vans shoes also ensures that they are more comfortable.
If the sole of your shoe is worn or scuffed, it can cause discomfort when you walk.
By taking the time to repair the shoe, you can make sure that it is comfortable to wear again and prevent any long-term damage.
Finally, repairing your Vans shoes can save you money.
Shoes can be expensive, so it is worth taking the time to repair them rather than having to buy a new pair.
This not only helps you save money in the short term, but it also helps you save money in the long term as your shoes will last longer.
Final Thoughts
Repairing your Vans shoes is a simple and effective way to make them look good as new.
With just a few steps, you can make your shoes look as good as they did the day you bought them.
Not only will you save money, but youll also be extending the life of your shoes.
So what are you waiting for? Grab your cloth, soft-bristle brush, and shoe glue, and get your Vans shoes looking great again!